Ginter Crossbody: A Free Crochet Pattern
“Brace yourself.” I mutter under my breath. With a toddler on my hip, a baby carrier on my arm, two eager children bouncing around my feet, and a backpack loaded for every possible emergency weighing down my shoulders, I prepared to open the font door. When I leave my home with all four children in tow, I prepare for battle. The battle of getting all the children down the rather steep brick steps. The battle of buckling four carseats - especially when the toddler REALLY wants to sit in a front facing seat, but isn’t quite ready yet. The battle that is motherhood.
“Yeeeesss.” I sigh with relief. The children are tucked safely in for their afternoon naps on a Saturday. Hubs is reading a book by the fireplace. I toss my ultra-light crossbody over my shoulder - it contains only the bare essentials: wallet, keys, phone. That crossbody bag is a symbol of freedom and independence for just a few short minutes. I love my children, but like all mothers, I sometimes like shopping at Hobby Lobby by myself.
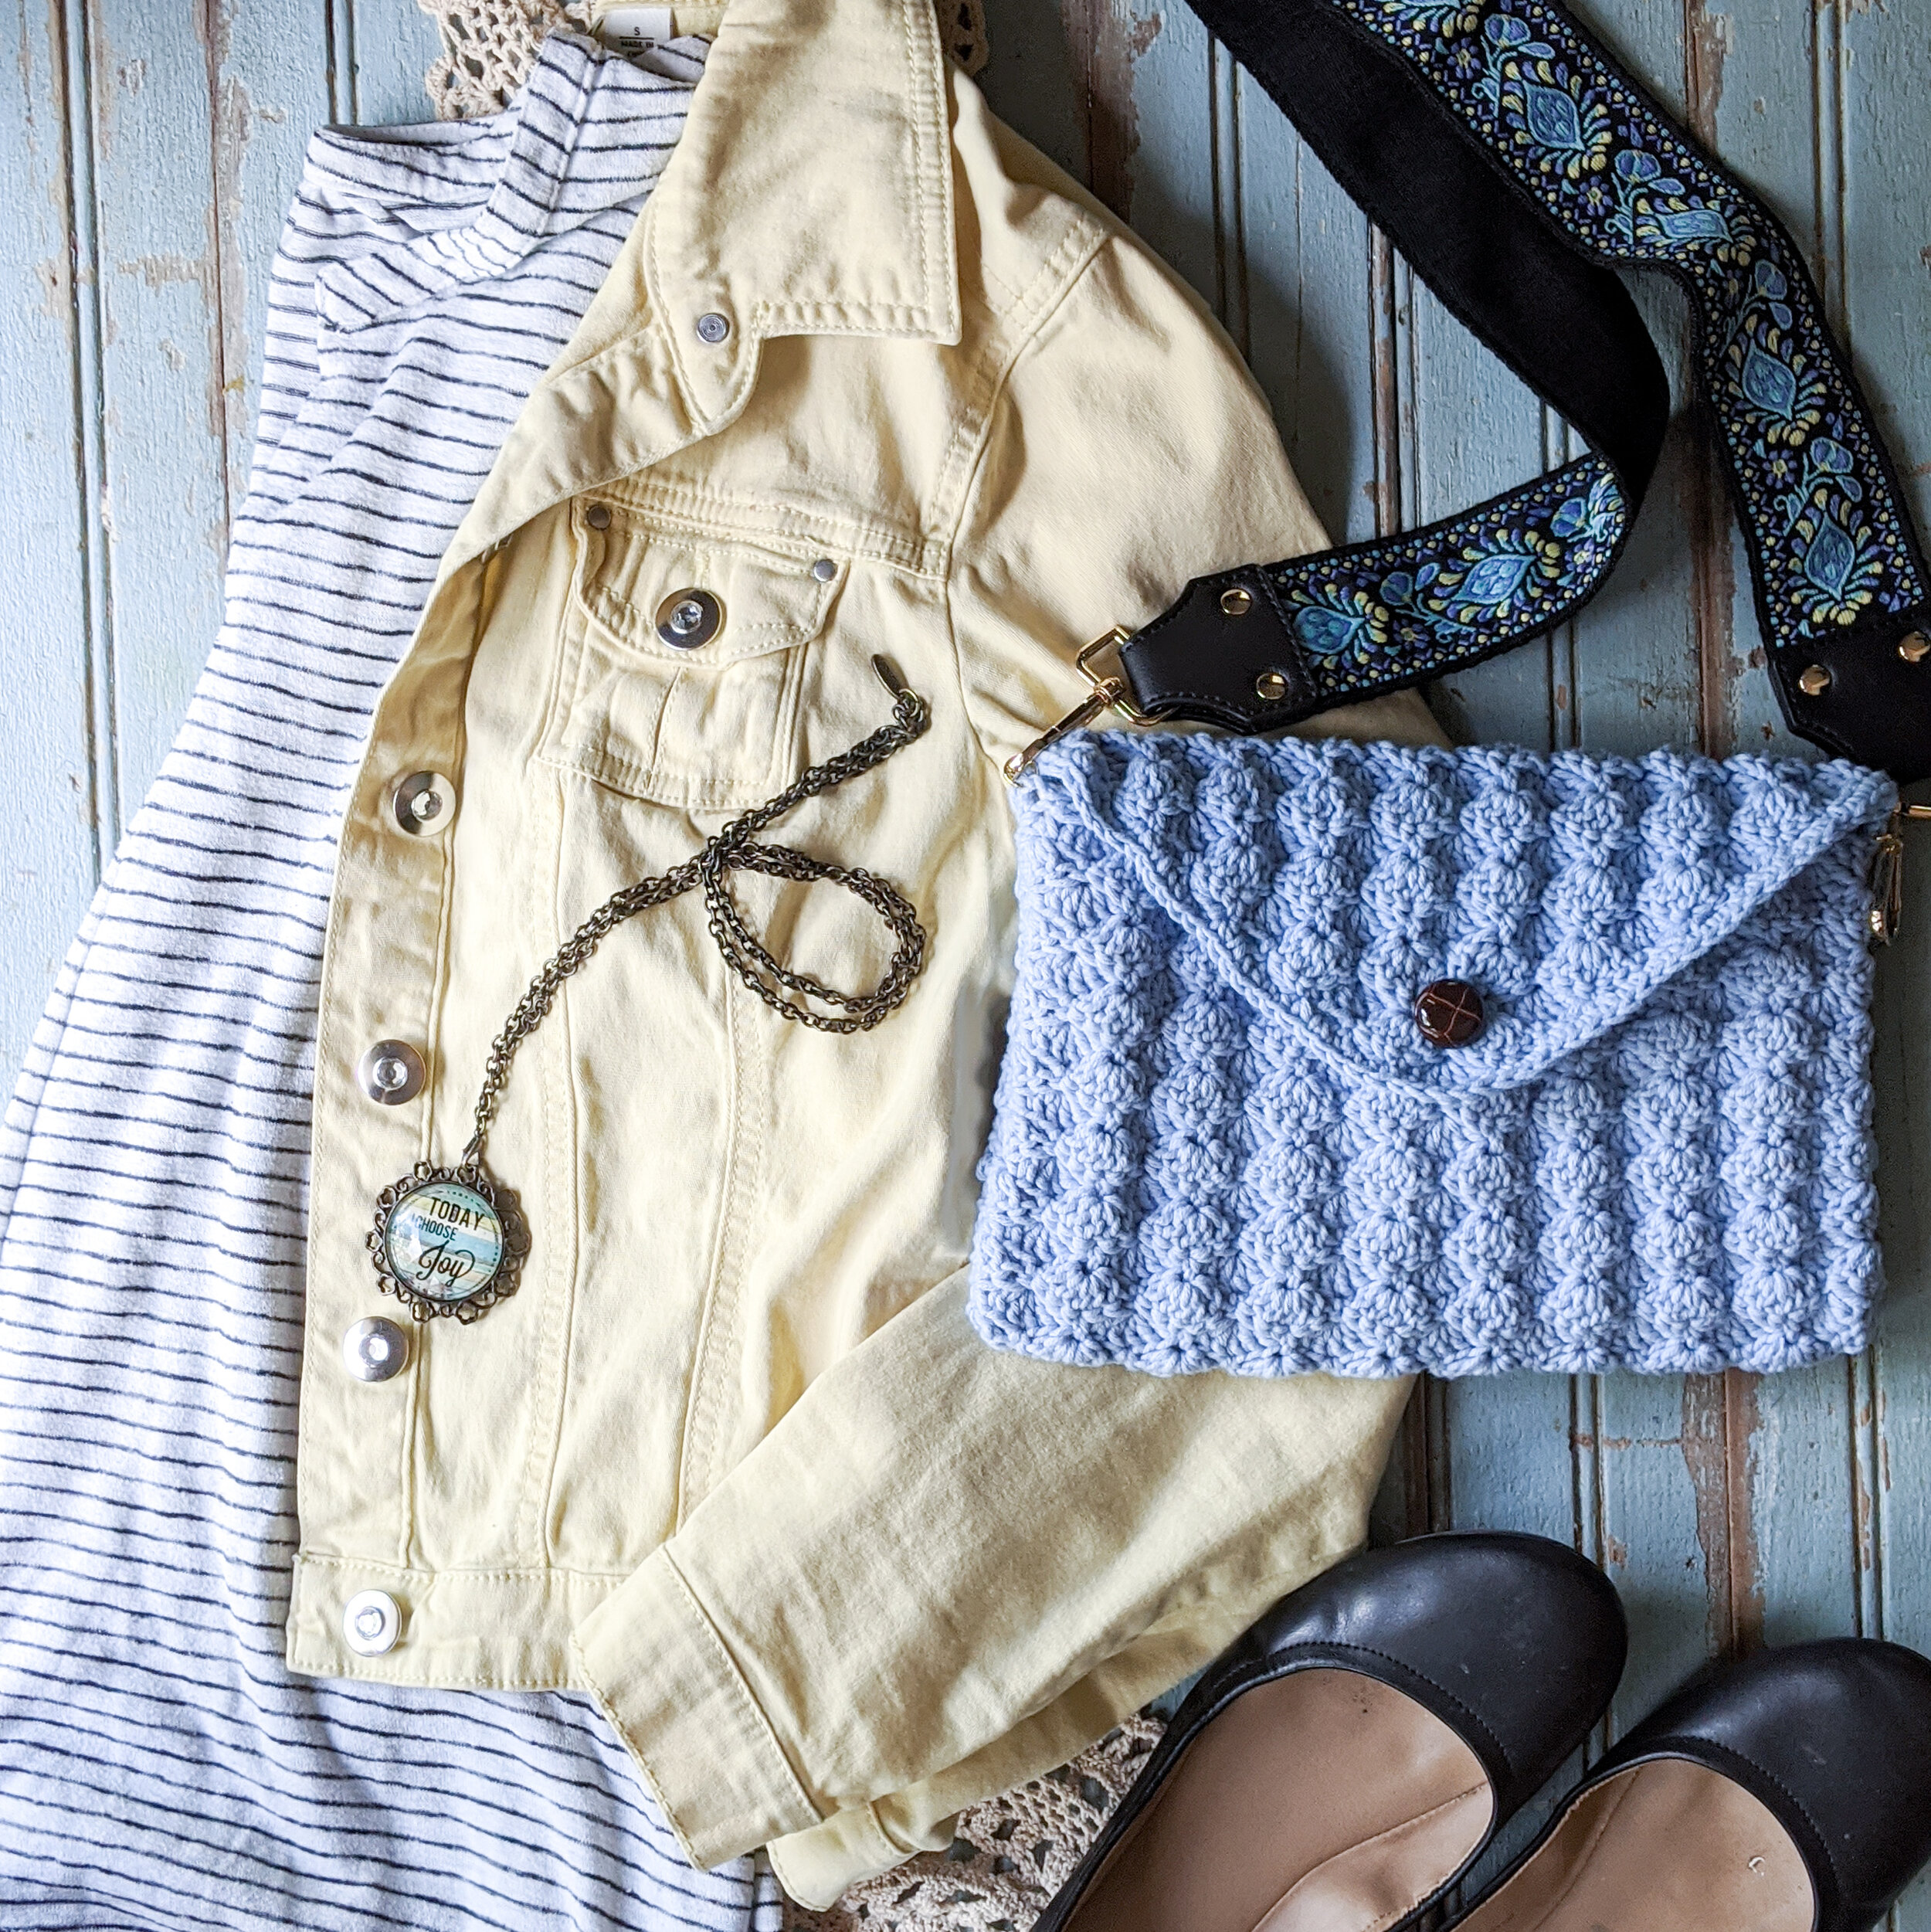
I love a good crossbody! Even better, I love showing off my handcrafted crochet pieces! This Ginter Crossbody is my new go-to piece when I escape the chaos of motherhood for a few brief hours.
Like it? Pin it to your favorite Pinterest board!
And don’t forget to follow me on Pinterest while you are there!
Ginter Crossbody: Free Crochet Purse Pattern #crochetpattern #crochetpurse #crochetbag #crochetsummer
This post contains affiliate links. I receive a small commission from your purchase through those links at no additional cost to you. Please see my Terms of Use for more details.
The Inspiration
The Ginter Crossbody is a sister pattern to my Ginter Baby Blanket crochet pattern. Both patterns use a version of the raised shell stitch, which give them a unique texture that sets them apart from a traditional shell stitch pattern. The raised shell stitch reminds me of tiny little rosebuds, right before they burst into bloom! Which is why the pattern is named after the Lewis Ginter Botanical Garden here in Richmond, Va.
The raised shell crochet stitch is worked in much the same fashion as the traditional shell, the only difference being the shells are worked in the back loop only. Using the back loop creates a deeper depth of texture that I found lacking in a traditional shell stitch. I love the traditional shell, but for the Ginter series, I was looking for a crochet texture that really popped! Using the back loop brought the hint of drama that I was looking for.
The Ginter Baby Blanket
Materials
I wanted the material of the Ginter Crossbody Crochet Pattern to be dense and sturdy - so cotton yarn was the obvious choice. I used Baby Bee Hushabye in Baby Blue, but if you don’t have a Hobby Lobby nearby, any DK/3 weight cotton will work perfectly! You could easily substitute Lion Brand Comfy Cotton or Bernat Softee Baby Cotton for the body of this purse.
You will also need a strap to turn this beauty into a crossbody. I wanted to add the whimsy by using a unique strap, so when my good friend Amazon suggested this sweet woven one, I quickly added to cart and awaited its momentus arrival. When I attached it to the purse and slung it over my shoulder, I quickly realized the woven strap was not truly a crossbody purse strap as advertised, but a guitar strap or camera strap. The woven wonder was too short to be comfortably worn as a crossbody. I imagine it might work for someone a bit smaller than me, but the woven strap worked well when worn over just one shoulder, but not as a crossbody. I’ll link it here, in case you still want it.
Let’s talk about crochet hooks
I used a 3.25mm/D hook for this project, which, I’m sure you know, is quite a small hook. Personally, I cannot crochet for long periods of time (or even short periods of time) with such a tiny hook. I opted to use an ergonomic hook. Currently, my favorite brand of ergonomic hooks are the Furls crochet hooks. These have a beautiful, streamlined appearance and a balanced weight. I find I can crochet quite comfortably for long periods of time using these hooks. Obviously, no two crocheters are the same! What works for me may or may not work for you. But for me, these are my “holy grail” of crochet hooks!
Furls Odyssey Hook
The Possibilities
To add a sense of practicality to this purse, you can also add a fabric lining to it! If I’m honest, the biggest downfall of using a crochet purse is the stitching. So many things that I shove in my purse catch and stretch my beautiful stitches, so adding a fabric lining was a must for me. I used some fabric scraps I had laying around and pulled out my sister’s sewing machine and whipped up a little two pocket lining that I hand sewed into the purse. If you want the full lining tutorial, it is included with the PDF copy of the pattern. The lining tutorial includes a full size template to cut out the lining pieces and a step-by-step photo tutorial to teach you to make the two pocket lining I used for my own. You can purchase the PDF copy of the pattern and lining tutorial in my Ravelry shop for $3.
PDF and Lining Tutorial available.
The Pattern
Materials:
Dk/3 weight cotton 100 yds
Baby Bee Hushabye in Baby Blue
3.25 mm Crochet Hook
Yarn Needle
Button
Needle and thread
Purse Strap
Two Jump Rings
Stitches and Terms:
Ch—Chain
BLO—Back Loop Only
Dc—Double Crochet
Fsc—Foundation Single Crochet
Ea—Each
Sc—Single Crochet
Shell—5 Double Crochet in same stitch
Gauge:
9 rows x 3.5 shells = 4” Follow instructions for Rows 1-9, beginning with a foundation chain of 19
Notes:
U.S. Terms
Stitches between *stars* are repeated.
Stitches in (parenthesis) are made in the same stitch or space.
Any DK/3 weight yarn should work with this pattern, as long as you meet gauge.
Ginter Crochet Crossbody Purse Pattern #freecrochetpattern #crochetpurse #crochetcrossbody #summerfashion
Let’s get Started!!
Fsc 38 or Ch 39, sc in 2nd ch from hook and in each chain
Row 1: Ch 1, sc in first st, *sk 1 sc, shell in next st, sk 1 sc, sc in next sc* repeat to the end. (9 shells)
Row 2: Ch 2, dc 3 in first sc, *sk 2 dc, sc in next dc, sk 2 dc, shell in blo of next sc,* repeat 7 more times, sk 2, sc in next dc, sk 2, dc 3 in last sc. (8 shells, 2 half shells)
Row 3: Ch 1, sc in first dc, *sk 2 dc, shell in BLO of next sc, sk 2 dc, sc in next dc,* repeat to end. (9 shells)
Rows 4-33: Repeat rows 2-3.
Row 34: Ch 1, dc in first sc, *sk 2 dc, sc in next dc, sk 2 dc, shell in BLO of next sc,* repeat 7 more times, sk 2 dc, sc in next dc, sk 2 dc, dc in last sc. (8 shells)
Row 35: Sk dc, sl st in sc, ch 1, dc in first sc, *sk 2 dc, sc in next dc, sk 2 dc, shell in BLO of next sc,* repeat 6 more times, sk 2 dc, sc in next dc, sk 2 dc, dc in last sc. (7 shells)
Row 36: Sk dc, sl st in sc, ch 1, dc in first sc, *sk 2 dc, sc in next dc, sk 2 dc, shell in BLO of next sc,* repeat 5 more times, sk 2 dc, sc in next dc, sk 2 dc, dc in last sc. (6 shells)
Row 37: Sk dc, sl st in sc, ch 1, dc in first sc, *sk 2 dc, sc in next dc, sk 2 dc, shell in BLO of next sc,* repeat 4 more times, sk 2 dc, sc in next dc, sk 2 dc, dc in last sc. (5 shells)
Row 38: Sk dc, sl st in sc, ch 1, dc in first sc, *sk 2 dc, sc in next dc, sk 2 dc, shell in BLO of next sc,* repeat 3 more times, sk 2 dc, sc in next dc, sk 2 dc, dc in last sc. (4 shells)
Row 39: Sk dc, sl st in sc, ch 1, dc in first sc, sk 2 dc, sc in next dc, sk 2 dc, shell in BLO of next sc, sk 2 dc, sc in next dc, ch 3 sk next 5 st, sc in next dc, sk 2 dc, shell in BLO of next sc, sk 2 dc, dc in last sc. (2 shells, 1 button hole) (See Pictures below)
Row 40: Sk dc, sl st in sc, ch 1, dc in first sc, sk 2 dc, sc in next dc, sk 2 dc, shell in BLO of next sc, sk 1 ch, sc in next ch, sk 1 ch, shell in BLO of next sc, sk 2 dc, sc in next dc, sk 2 dc, dc in last sc. (2 shells) (See Pictures on page 4)
Row 41: Sk dc, sl st in sc, ch 1, dc in first sc, sk 2 dc, sc in next dc, sk 2 dc, shell in BLO of next sc, sk 2 dc, sc in next dc, sk 2 dc, dc in last sc. (1 shell). Fasten off. Weave in ends. Continue to Edging and Seaming.
Forming the button hole Row 39
Forming the button hole Row 40
Edging and Seaming
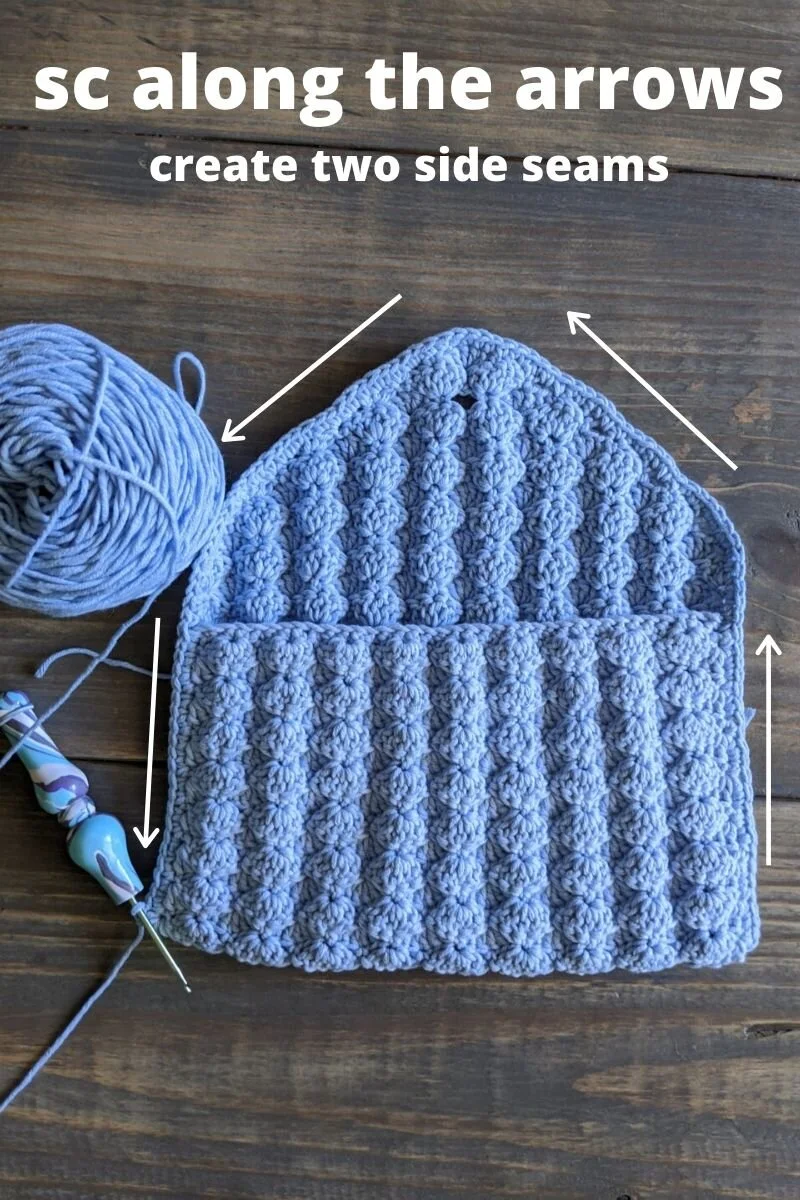
Fold the bottom (Row 1) up to just before the decrease (Row 32).
Pull up a loop through both layers and single crochet around. See the illustration.
Turn right side out and add button.
Add a jump ring to each corner to clip the strap to.
This pattern is written by Rebekah Haas. I hold the copyright to this pattern. It should not be published, shared, or sold without direct permission of the designer. You are, of course, welcome to sell any items you make using this pattern. If you post pictures of your item on Instagram or Facebook, please credit me with the design by linking to my Instagram account or website. Thank you for choosing to make my pattern! I hope it inspires you!
Ginter Crossbody Free Crochet Pattern #freecrochetpattern #crochetpurse #summerfashion #summercrochet


