Terni Pillow: Free Crochet Pattern
I love the lived in, the slightly won, the wrinkled cotton, faded leather, rich wood, and chipped paint - a touch of the industrial, with a heavy dash of the practical. My counters, adorned with wire baskets filled with fresh produce, are cluttered with potted plants. The walls seem imbued with the rich aroma of fresh coffee. Warm water rushes over my hands as I, washing dishes (again), glance over my plant crowded windowsill. I smile. There, dancing with the buttercups to the tune of robins and spring breezes, my children frolic. The pounding of small feet on the wooden steps accost my ears mere seconds before the door bursts open, “These are for you!” A handful of wildflowers are hastily deposited on the kitchen table.
The Terni Pillowcover pattern is inspired by the simple joys of farmhouse living. One piece of linen stitched material is folded over itself to form an envelope. Surface stitches adds the rustic ticking stripes in a classic blue. The vintage inspired puff stitch border adds that touch of whimsy I love so much.
If you like it, pin it!
Terni Pillow Cover Crochet Pattern
This post contains affiliate links. I receive a small commission from purchase through these links at no additional cost to you. Please see the Terms of Use for more details - it is boring, but it does the job!
The Materials
This is a simple pattern that uses easy to find yarn. I used a classic acrylic worsted weight yarn, think I Love this Yarn from Hobby Lobby, or Lion Brand Pound of Love, or even Red Heart Super Saver. I used Caron 1 lb. in white for the body of the pillow and a store brand acrylic yarn in navy for the stripes and border - it was basically the same as Caron 1 lb, just already in my stash! In fact, this is a fantastic pattern to shop your stash for, since you only need a tiny bit of that contrast color, and we all have an extra skein of worsted weight yarn laying around!
I hooked up this crochet farmhouse pillow cover using my classic Boye hook, but trust me when I say, I would much rather use my ergonomic hooks from Furls!
Get your Furls Hook!
The buttons I originally bought on Amazon came in a set of 100 for just $5! That same set is not available, but I find Amazon has a wider selection of quality buttons at a good price than my local craft store (Sorry, Hobby Lobby, but it’s true). You can have as much fun with the buttons as you want, but I’m partial to the rustic look of these bamboo buttons!
This pattern is designed to fit an 18”x18” or 20”x20” pillow. I like to use a pillow insert that is a little bigger that the actual pillow case, so the pillow looks big and fluffy, not flat. I love these down alternative inserts:
Terni Pillow Cover Free Crochet Pattern
If you want to make the Terni crochet pillow cover, but prefer to work from a printed hard copy of the pattern, you can find the ad-free, printer friendly version in my Ravelry shop!
For me, one of the most exciting parts of designing the Terni Pillow Cover was knowing it would be featured on the Desert Blossom Crafts blog by Rachel! If you haven’t been over there already, you need to check out her super easy-to-follow stitch tutorials and patterns! I love that her patterns are easy to make and understand, but still have that impact of a professionally designed garment!
And now, the pattern!
Terni Pillow Cover Free Crochet Pattern
Materials:
Worsted/4 weight yarn (I used Caron One Pound)
Color A: 230 yds
Color B: 100 yds
Hook I/5.5 mm
Five Buttons of choice
Thread to sew on buttons
Yarn needle to weave ends
Sewing needle for buttons
Stitch Marker/Progress Saver
20” x20” Pillow insert
Stitches and Terms (U.S. Terms):
St—Stitch
Ea—Each
Ch—Chain
Sl St—Slip Stitch
Sc—Single Crochet
Gauge:
13 st x 13 rows = 4” Gauge is worked in moss stitch as illustrated in the pattern.
Notes:
The pattern is made to be an 18” x 18” pillow cover. I used a 20” x 20” down insert in mine, because I like fluffy pillows.
The pattern shrinks a little as you work it, but it should measure 18” wide with a little stretching.
Work the surface stitching loosely. It does not have as much stretch as the moss stitch, so it will scrunch up the pillow cover if stitched too tightly.
I stitched the buttons on AFTER adding the pillow insert, to accurately gauge how far down the button need to go. I recommend doing the same, but I will also provide exactly where I put mine as part of the pattern.
Remember—it is designed to stretch! Don’t be afraid to take advantage of it!
The Terni Pillow is one piece that is folded to form an envelope closure at the top. This pattern also features surface stitching, a full photo tutorial for that stitch is included.
Pattern: Color A
Ch 64
Row 1: Sc in fourth ch from hook, *ch 1, sk 1 ch, sc in next ch* repeat across. (31 sc)
Row 2: Ch 3 (counts as sc + ch1), sc in next ch 1 sp, *ch 1, sc in next ch 1 sp* repeat across. (31 sc, 1 ch 3 sp)
Row 3-140: Repeat Row 2. Fasten off, weave in ends.
Stripes: Color B
I have thirty ch 1 spaces, so I spaced five stripes every five spaces. You can, of course, add more or fewer stripes to suit your personal taste!
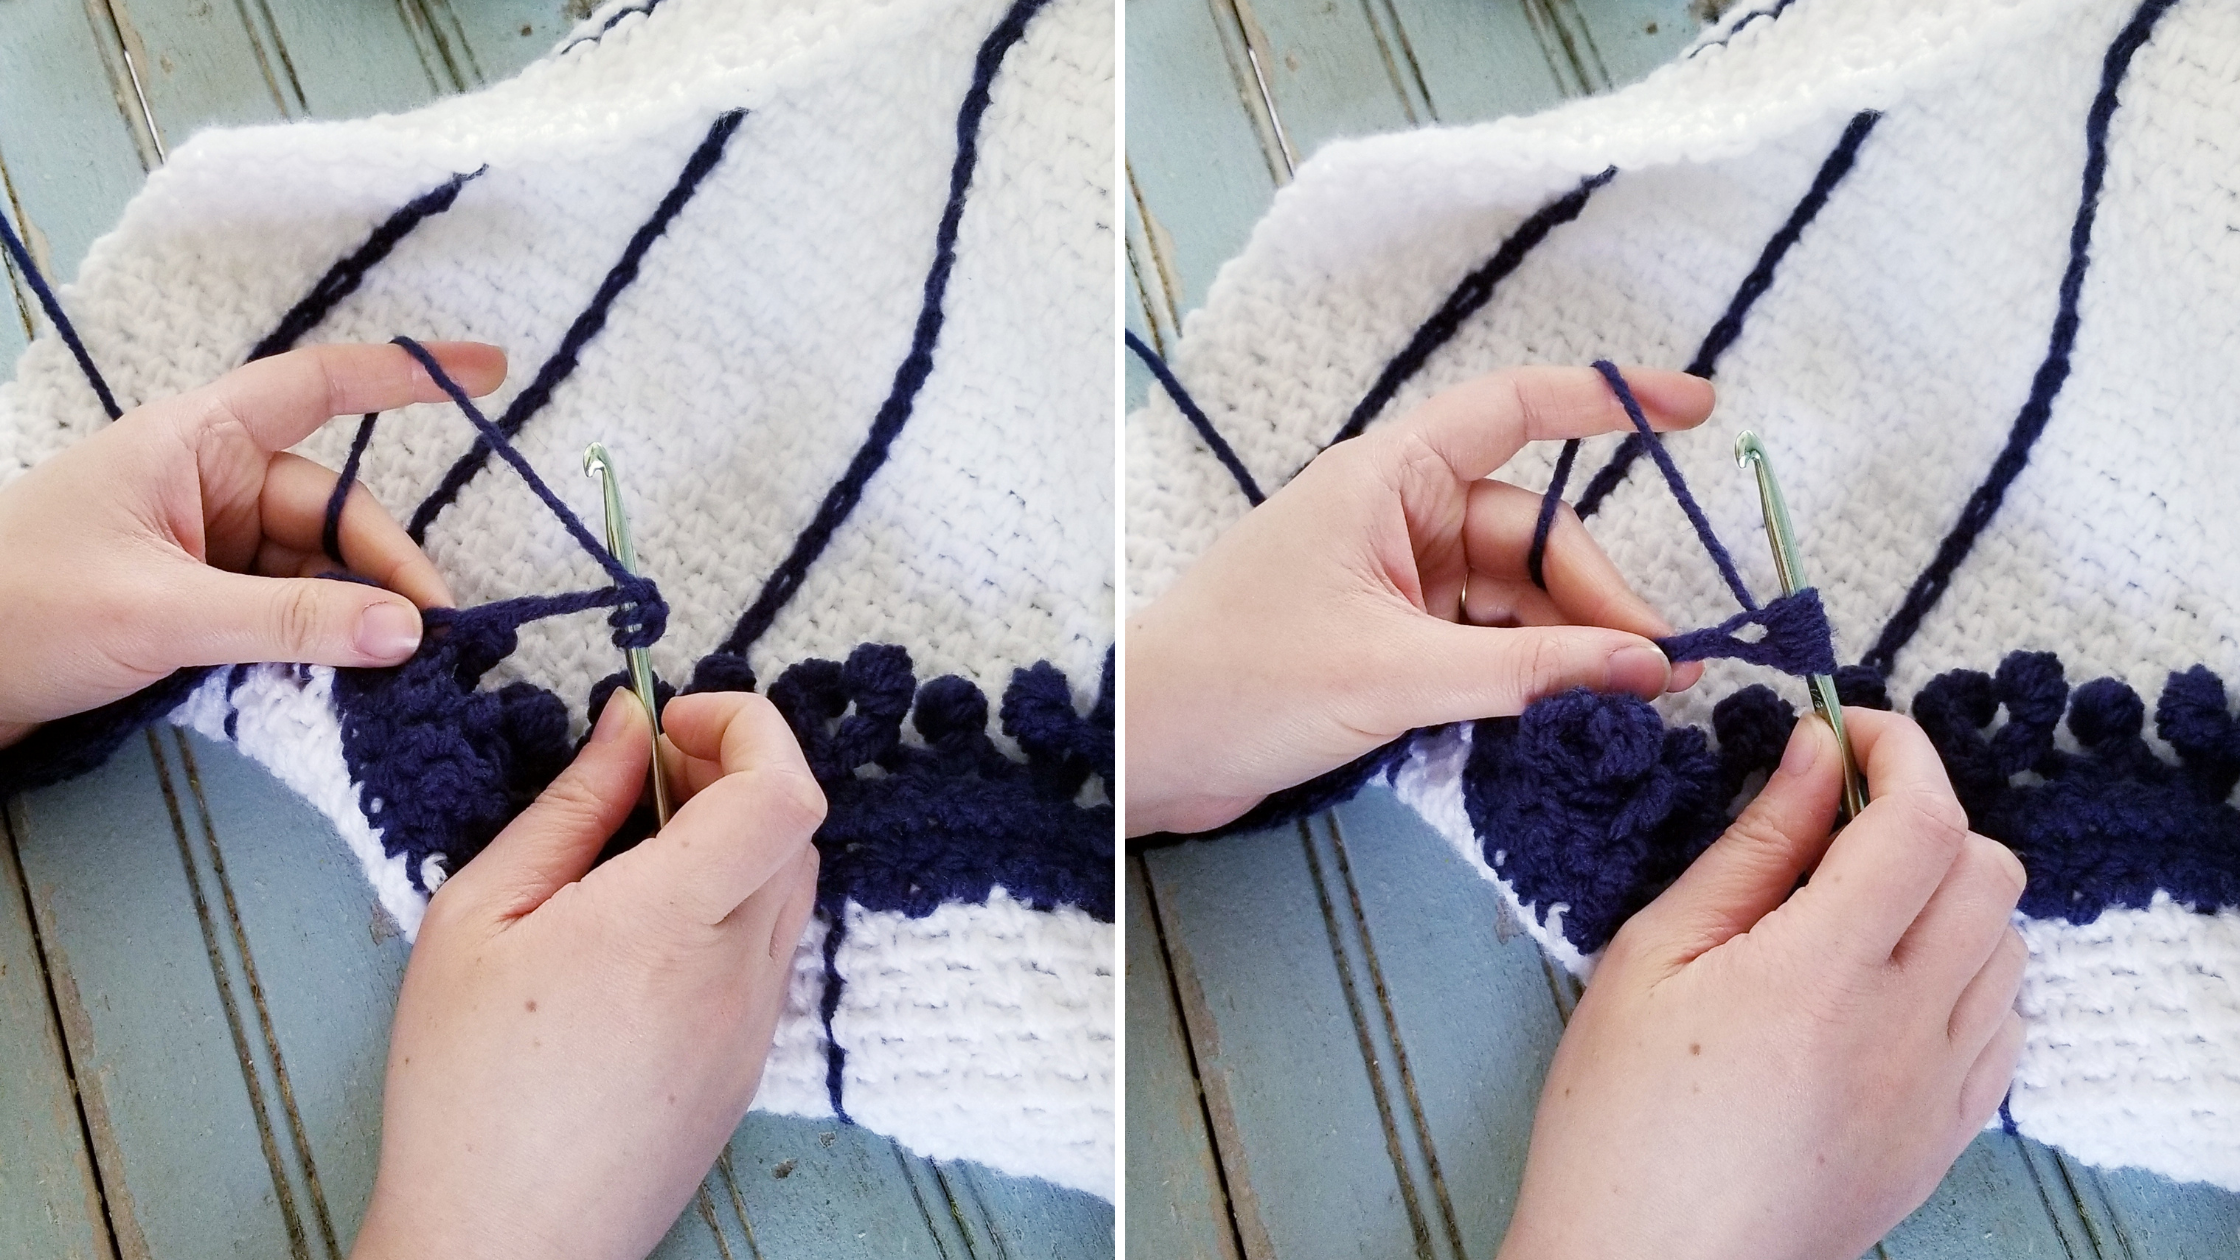
1. Pull up a loop in the space desired in row 1. Pull the loop up tall, so it is roughly the height of a sc. Too tight will wrinkle the pillow cover.
2. Skip the sc in Row 2, insert the hook into the ch sp of Row 3 directly above where you pulled up a loop. Pull up a loop in this space to make a sl st.
3. Continue up the pillow cover, skipping the sc and creating a sl st in ea ch sp. Fasten off, weave in ends.
Side Seams:
Fold the pillow cover with right sides facing each other and pin Row 1 to Row 115. I used a stitch marker through the ends of both rows. Insert your hook through the first stitch from Row 1 and Row 115 and pull up a loop. Slip stitch down the side, one stitch in each row. Repeat on the other side. Fasten off, weave in ends.
If you prefer, you can use the mattress stitch or whip stitch to seam up the pillow. A slip stitch is my preferred method.
Your seam will have roughly 1/8” - 1/4” seam allowance (a little ridge). Turn the pillow right side out again, so the seam is on the inside.
Edging: Color B
Join Color B to the corner of row 140, right side facing you. I used this as an opportunity to work my ends under, instead of weaving them all in with a needle. Feel free to take the shortcut!
Also, I wanted the buttons to line up with the stripes. If you do more or few stripes, you may want to add your buttons to line up with the stripes.
Row 1: Ch 1, sc in ea sc and ch 1 sp across. (60 sc)
Row 2: Ch1, sc in next 9 sc, ch 2, sk 2,* sc in next 8, ch 2, sk 2 * repeat three more times, sc in last 9 sc. (50 sc)
Row 3: Ch 1, sc in ea st, 2 sc in ea ch 2 sp (60 sc)
Row 4: Ch 1, sc in first sc, *ch 5, puff st in 2nd ch from hook, sl st in 3rd ch from hook, ch 3, sk 2 sc on main edging, sc in next sc* Repeat across. (20 puff st) Do not fasten off! You will carry this yarn over to the side edging.
Side Edging: Color B
Continue the edging by turning the pillow so you are working on the side of the top flap. Sc in the side of each row along the top flap until you reach the top of the seam. Sl st in the first three stitches of the seam (this creates a more visually pleasing transition for the side edging). Fasten off, weave in ends.
Pull up a loop in Color B at the end of Row 4 of the edging. Sc in the side of each st along the top flap until you reach the seam. Sl st in the first three stitches of the seam. Fasten off, weave in ends.
Final Touches:
Stuff the pillow with your insert and sew the buttons on where desired. I stitched mine on the stripes at Row 15.
Don’t forget to share this pattern on Pinterest!
Terni Pillow Cover Free Crochet Pattern
The Terni Pillow Cover crochet pattern is written by Rebekah Haas. I hold the copyright to this pattern. It should not be published, shared, or sold without direct permission of the designer. You are, of course, welcome to sell any items you make using this pattern. If you post pictures of your item on Instagram or Facebook, please credit me with the design by linking to my Instagram account or website. Thank you for choosing to make my pattern! I hope it inspires you!


