Treviso - the Faux Knit Beanie: Free Crochet Pattern
My husband is cold. How many of us have picked up our hooks for this very reason? I have made many hats for him, but often he looks at my creation in doubt, declaring, “It should be simpler.” Finally, I came to the realization that he was looking for a knit beanie. The neat rows of little knit “v’s” appealed to him. However, instead of brushing up my TERRIBLE knitting skills, I’ve adapted the crochet waistcoat or knit stitch for this super simple, easier than you can imagine, husband approved beanie. At least, my husband approved.
In my effort to create the ultimate simple beanie, I was inspired by the ancient ruins in Treviso - a city older than the Romans. The simple beauty of the ruins surrounded by lush foliage, juxtaposed with the modern advancements of the city are reflected in the traditional look of the faux knit beanie, but our modern, colorful yarns can really shine against the simple stitch backdrop.
If you like it, pin it!
Don’t forget to follow me on Pinterest for more fun ideas and crochet inspiration!

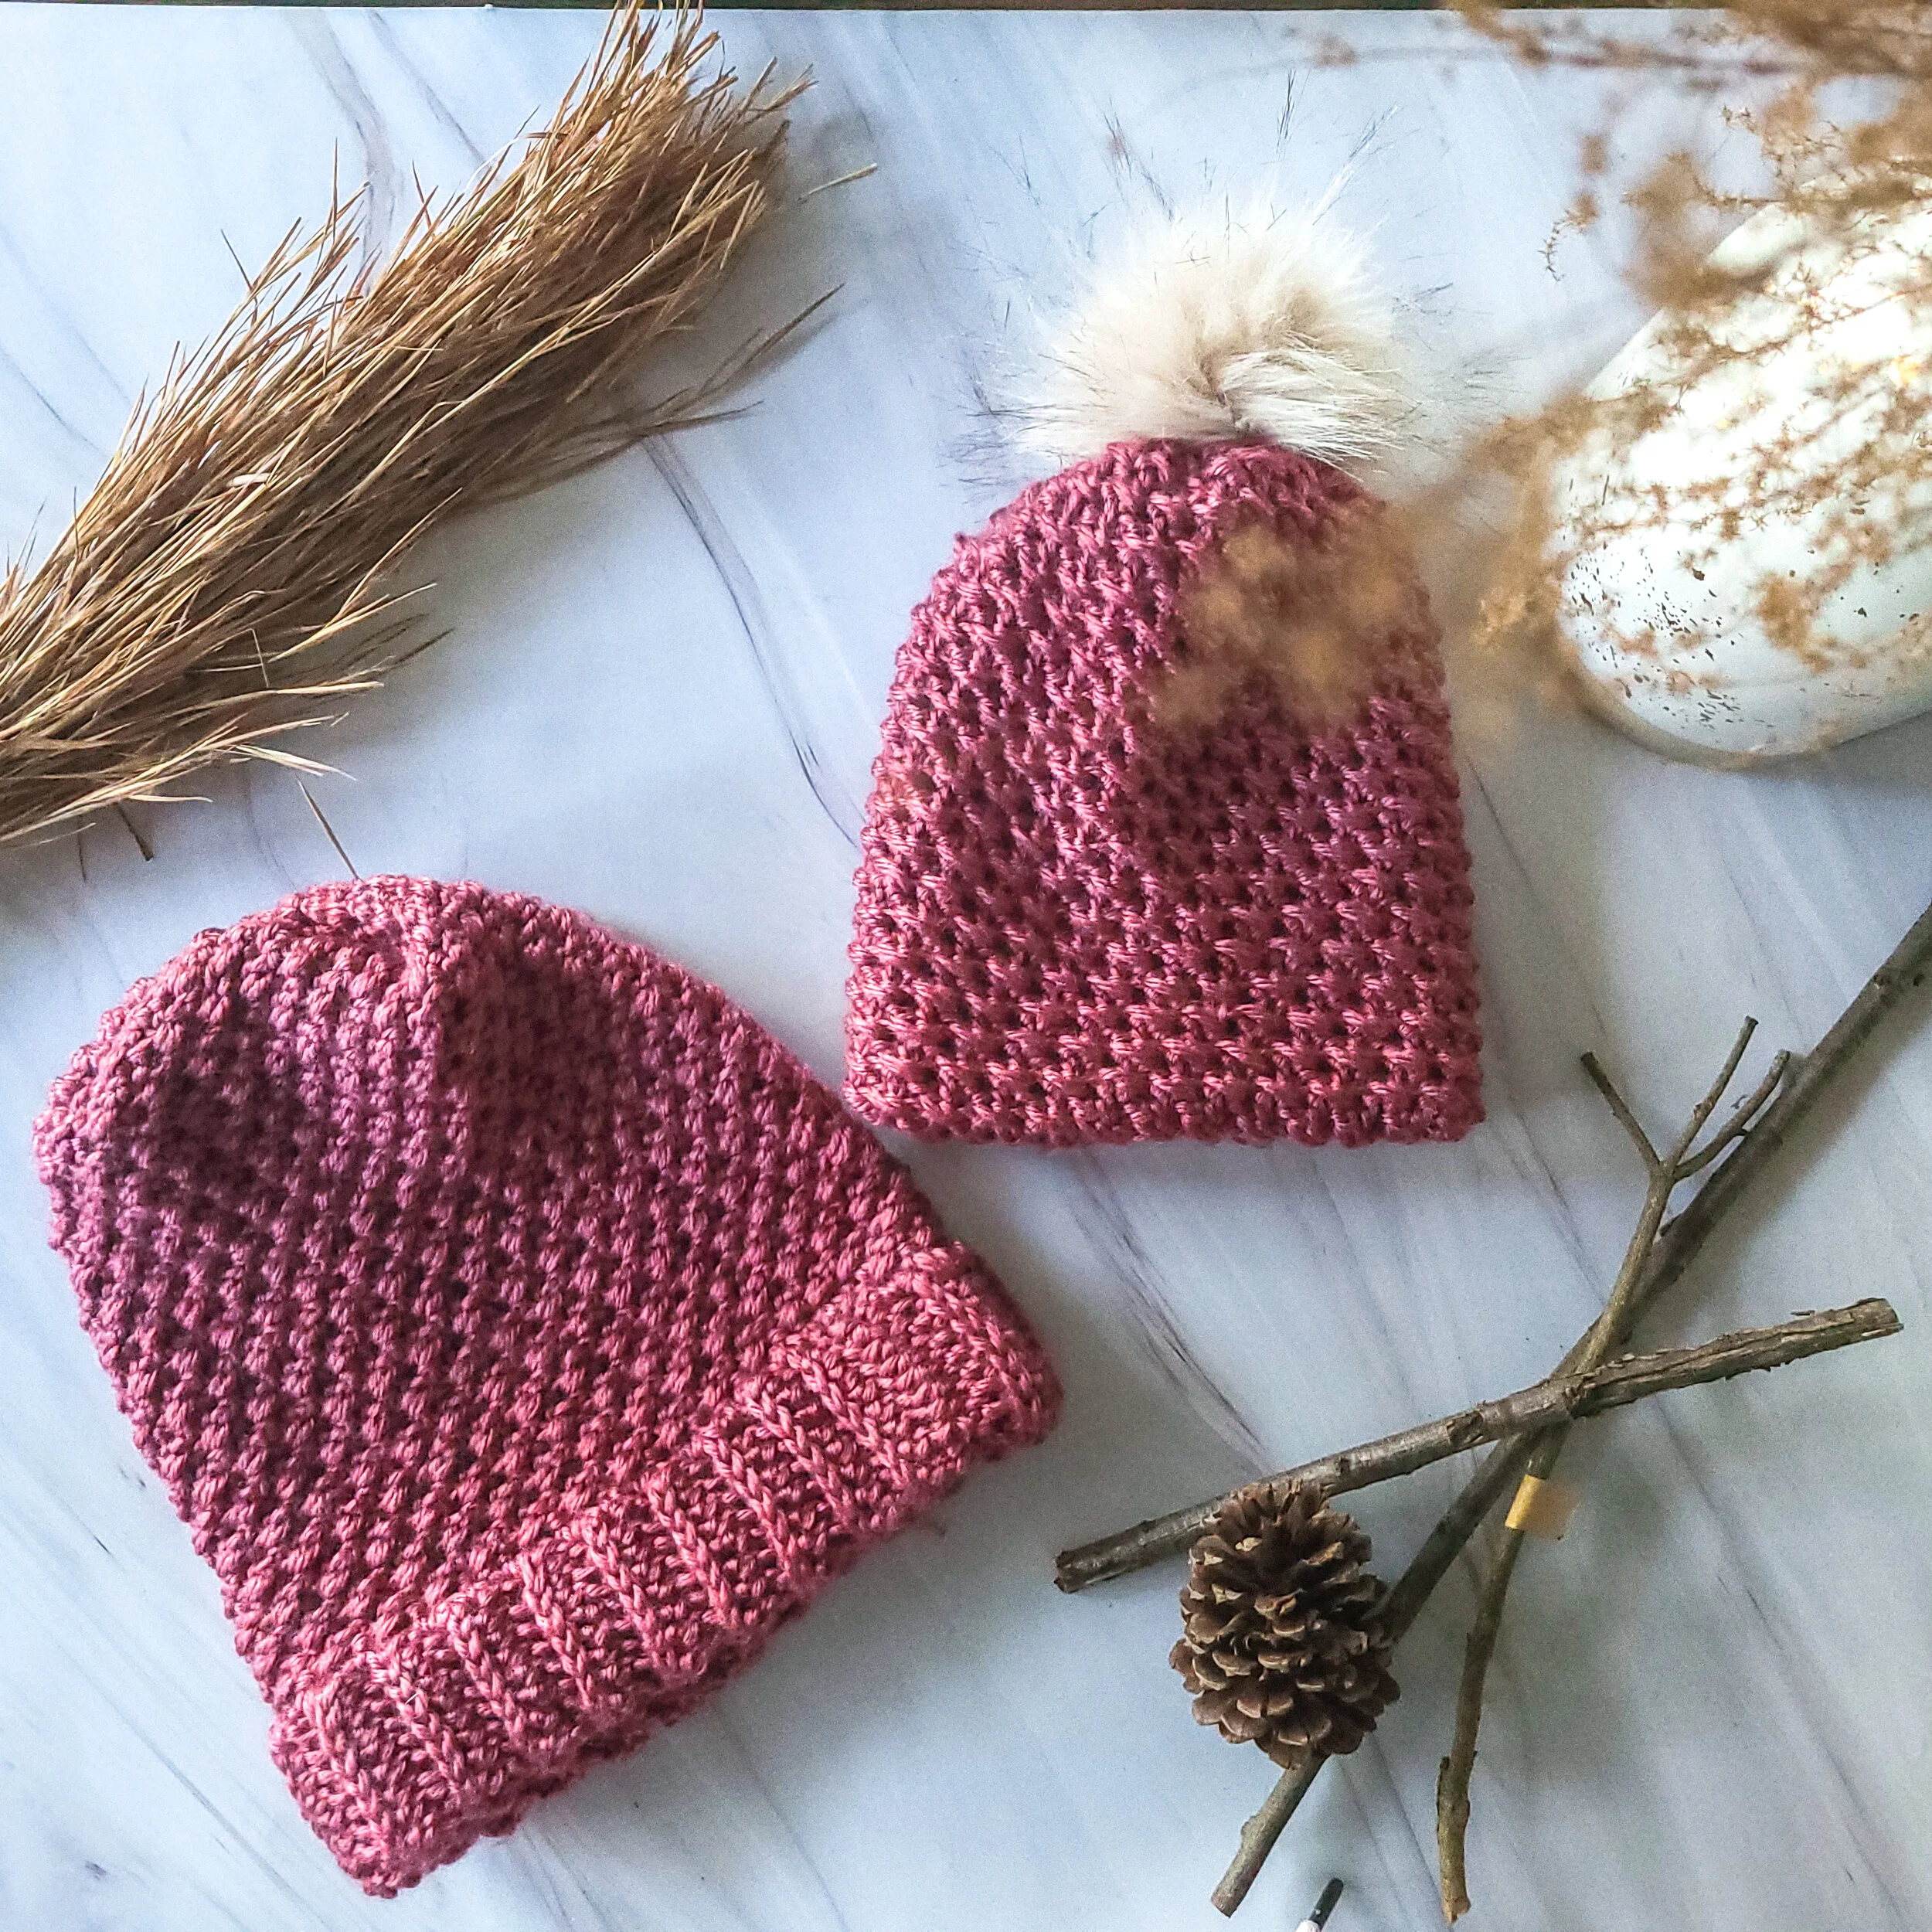
Create a knit look beanie using crochet.
This post contains affiliate links. I receive a small commission from your purchase through these links at no additional cost to you. Please see my Terms of Use for more details.
The yarn:
At this point, I’ve made several versions of this hat, all in different variations of DK/3 weight yarn. The first one I made was in the DK weight yarn from my Leither Co. subscription box (read more about that amazing opportunity here) in the colorway Dragonfly. My second version of the hat was made for my niece in some left over Lion Brand Mandala. I also just finished a stunning version in Mary Maxim Prism. But wait, there is more! I’m also making ANOTHER in a gray tonal yarn from Harbor Fibres. The best part? Each hat is so incredibly unique, because the simple waistcoat stitch allows each colorway to speak for itself. Of course, I have used wool, wool blends, and acrylic yarn.

The tools:
I used two different hooks sizes for this beanie. I started with a smaller hook for the hat band to give it some extra stretch and a snug fit. I switched to a larger hook size for the body of the hat. I chose an aluminum hook, the Boye Ergonomic, for the waistcoat stitch portion of the hat. I definitely receommend using a metal hook with a slightly more pointed head - like Clover Armour, or most basic metal hooks.
Many crocheters find this stitch a little challenging, since it has a tendency to pull too tightly to work into. I highly suggest that you go up a hook size if needed to acheive a very loose stitch that is easier to work in. If you need to eliminate a couple of rows from the height of the hat to make up for a larger stitch, it will be well worth it for the extra ease of making the stitches.
Since this hat is worked in continuous rounds, I recommend using a stitch marker at the beginning of each row and moving it up as the rows are complete to help you keep track of where you are in the pattern. You can easily make your own using this tutorial.

Fashion Potential
The Treviso Beanie can be maded with ANY weight yarn, if you adjust your hook size. Since the hat is made in a single stitch repeat, you can use the included size chart to make a fully cusom hat with any yarn! The pattern includes the instructions for both a fitted and for a slouchy beanie pattern. My husband prefers the fitted look, but I’m a huge fan of the slouchy beanie look.
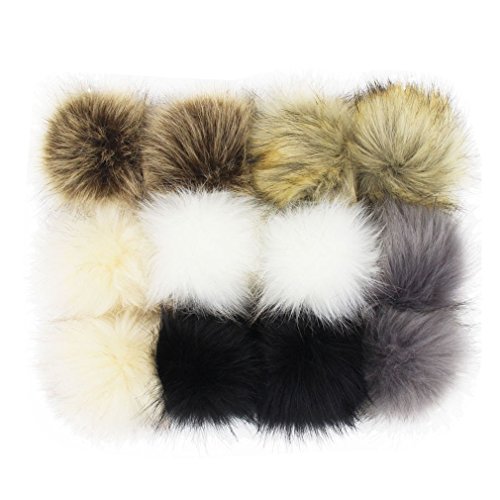
This beanie pattern is perfect for accessoriazing - with tthose neat little stitches showing off your favorite yarn, top it off with a dramatic faux fur pom pom for a one of a kind look. You can buy faux fur poms with elastic loops on Amazon, or check our your favorite Etsy makers for handmade ones.
The Treviso Beanie isn’t my first beanie pattern and won’t be my last! Check out the my other beanie patterns if Treviso isn’t quite what you are looking for.

1. Munich Beanie - Features a bulky look texture. Thick and cozy, this hat will keep anyone warm this winter.
2. Basketweave Beanie - with a simple, subtle texture, this hat works up lightly but warmly when alpaca wool is used!
3. Florence Beanie - also made with Lion Brand Mandala, the fun, lacy structure works up quickly for a delicate and feminine hat.
Featured by Mary Maxim
I’m thrilled that the Treviso Faux Knit Beanie Crochet Pattern is being featured on the Mary Maxim blog for their Days of Christmas series! Each day of December leading up to Christmas, they are featuring a new crochet pattern that you can download the PDF for free! To get your free version of the Treviso Beanie, head here.
Of course, you can find my patterns for sale on Ravelry as well. Head over there to add this pattern to your queue and show it some love!
If you make the Treviso Faux Knit Beanie, I’d love to see! You can show off your hat by either adding it as a project on Ravelry and tagging my pattern, or you can share it on Instagram (please tag me) or share it with me on Facebook!

Treviso Faux Knit Beanie Crochet Pattern
The Treviso Faux Knit Beanie Pattern
Materials:
250 yds DK/3 Weight Yarn
4.25 mm hook
5.00 mm hook
Yarn Needle to weave ends
Thread Needle (optional)
Matching thread of choice (optional)
Button (optional)
Faux Fur Pom with elastic loop (optional)
Stitches and Terms:
Sc - Single Crochet
Waistcoat St- Waistcoat Stitch
Sl St - Slip Stitch
Ch - Chain
BLO—Back Loop Only
Ea—Each
Gauge:
Using 5 mm hook, 8sc x 8 rows = 2”
Notes and Skills:
This hat is worked in the waistcoat stitch. Some crocheters struggle with this stitch due to tight tension. If you naturally have a tight tension, I recommend going up a hook size to 5.5 mm or even 6 mm (please double check gauge as needed).
I recommend using an aluminum hook with a pointed (rather than rounded) head to easily insert your hook in the appropriate space.
This hat can easily be made with fingering, worsted, or bulky yarn. You will want to make sure that your brim first meets the recommended sizing, then continue with the hat pattern until you reach the desired size.
This hat is a single stitch repeat. This means you can begin with any number of brim rows and still be able to follow the pattern as written. As long as the hat measurements fit the recipient, you are good to go!
This hat is worked in continuous rounds. This means you will not join the last stitch of a round to the first stitch, but just continue working around the hat. This method prevents the line or seam that appears in many projects worked in joined round. To keep track of the number of rounds completed, I suggest using a stitch marker on the first stitch of each round, moving the marker up as you complete the rounds.
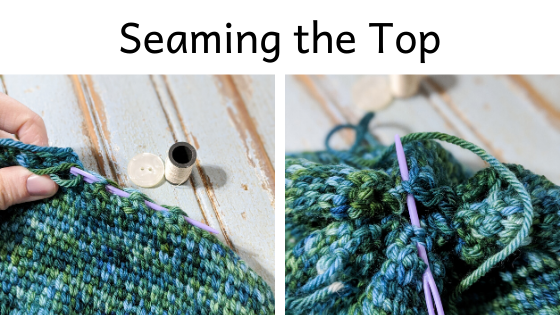
After the hat has reached the desired height, fasten off, turn it inside out, and seam up the top.
You can add a small button to the inside top of the hat. When the hat is turned right side out, loop the elastic loop from the faux fur pom pom through the stitches at the crown and around the button. This will keep your pom pom secure, but also removable if the hat needs to be washed.
If you have any questions regarding this or any of my patterns, please contact me at r.haas@rebekahhaas.com
Hat sizing is writing in three sections: infant (preemie—12 months), child (1-10 years), and youth/adult (preteen—adult large). Each section will break down the sizing exactly starting with the smaller size and ascending to the larger size.

Create the knit look with a crochet pattern!
Infant Sizes:
Preemie, Newborn, 0-3 months, 3-6 months, 6-12 months
Brim:
Using 4.25 mm hook
Row 1: Ch 7, turn, sc in 2nd ch from hook and next 5 ch. (6 sc) Turn.
Row 2-40, 48, 56, 60, 64: Ch 1, sc in blo of ea sc. (6 sc) Turn.
Use sl st to join the last and first rows together. Turn so the seam is on the inside, DO NOT FASTEN OFF. Continue to the body of the hat.
Body of Fitted Hat:
Using 5.00 mm hook
Work Row 1 VERY loosely to make the next rows easier.
Row 1: Ch 1, sc in the side of ea brim row—do not join. (40, 48, 56, 60, 64 sc) Continue to next row without joining.
Row 2-16, 20, 22, 24, 26 : Waistcoat st in ea st—do not join. (40, 48, 56, 60, 64 waistcoat st) Continue to next row without joining.
Row 17, 21, 23, 25, 27: *Waistcoat st decrease across next two st, waistcoat st in next 2 st. * repeat around. If an extra st remains, sc in it. Fasten off, leave a long tail.
Turn hat inside out, using yarn needle, weave the long tail in a running stitch along last row. Pull tight. Place a few, tight stitches in a x shape across the opening to secure it. Tie off and weave in ends.
Attach button if desired while the hat is inside out, using embroidery needle and thread. Turn right side out and add pom pom.
Child Sizes
1-3 years, 3-5 years, 6-10 years
Brim:
Using 4.25 mm hook
Row 1: Ch 7, turn, sc in 2nd ch from hook and next 5 ch. (6 sc) Turn.
Row 2-68, 72, 76: Ch 1, sc in blo of ea sc. (6 sc) Turn.
Use sl st to join the last and first rows together. Turn so the seam is on the inside, DO NOT FASTEN OFF. Continue to the body of the hat.
Body of Fitted Hat:
Using 5.00 mm hook
Work Row 1 VERY loosely to make the next rows easier.
Row 1: Ch 1, sc in the side of ea brim row—do not join. (68, 72, 76 sc) Continue to next row without joining.
Row 2-28, 30, 32: Waistcoat st in ea st—do not join. (68, 72, 76 waistcoat st) Continue to next row without joining.
Row 29, 31, 33: *Waistcoat st decrease across next two st, waistcoat st in next st. * repeat around. If an extra st remains, waistcoat st in it. Fasten off, leave a long tail.
Turn hat inside out, using yarn needle, weave the long tail in a running stitch along last row. Pull tight. Place a few, tight stitches in a x shape across the opening to secure it. Tie off and weave in ends.
Attach button if desired while the hat is inside out, using embroidery needle and thread. Turn right side out and add pom pom.
Body of Slouchy Hat:
Using 5.00 mm hook
Follow instructions for fitted hat, but make these alterations:
Row 2-36, 38, 40: Waistcoat st in ea st—do not join. (68, 72, 76 waistcoat st) Continue to next row without joining.
Row 37, 39, 41: *Waistcoat st decrease across next two st, waistcoat st in next 2 st. * repeat around. If an extra st remains, sc in it. Fasten off, leave a long tail.
Follow instructions for seaming and adding pom pom as listed above.

Treviso Faux Knit Beanie Free Crochet Pattern
Youth/Adult
Preteen/teen, adult small, adult large
Brim:
Using 4.25 mm hook
Row 1: Ch 9, turn, sc in 2nd ch from hook and next 5 ch. (9 sc) Turn.
Row 2-80, 84, 88: Ch 1, sc in blo of ea sc. (9 sc) Turn.
Use sl st to join the last and first rows together. Turn so the seam is on the inside, DO NOT FASTEN OFF. Continue to the body of the hat.
Body of Fitted Hat:
Using 5.00 mm hook
Work Row 1 VERY loosely to make the next rows easier.
Row 1: Ch 1, sc in the side of ea brim row—do not join. (80, 84, 88 sc) Continue to next row without joining.
Row 2– 32, 34, 36: Waistcoat st in ea st—do not join. (80, 84, 88 waistcoat st) Continue to next row without joining.
Row 33, 35, 37: *Waistcoat st decrease across next two st, waistcoat st in next st. * repeat around. If an extra st remains, waistcoat st in it.
Fasten off, leave a long tail.
Turn hat inside out, using yarn needle, weave the long tail in a running stitch along last row. Pull tight. Place a few, tight stitches in a x shape across the opening to secure it. Tie off and weave in ends.
Attach button if desired while the hat is inside out, using embroidery needle and thread. Turn right side out and add pom pom.
Body of Slouchy Hat:
Using 5.00 mm hook
Follow instructions for fitted hat, but make these alterations:
Row 2-40, 42, 44: Waistcoat st in ea st—do not join. (80, 84, 88 waistcoat st) Continue to next row without joining.
Row 41, 43, 45: *Waistcoat st decrease across next two st, waistcoat st in next 2 st. * repeat around. If an extra st remains, sc in it. Fasten off, leave a long tail.
Follow instructions for seaming and adding pom pom as listed above.
Finishing Touches
Seaming:
1. Turn hat inside out.
2. Thread the long tail through the yarn needle.
3. Weave the needle in and out of the final row of stitches.
4. Pull tight.
5. Place several, secure stitches in an “x” shape over the cinched up crown.
6. Fasten off securely and weave in the end.
Add Pom Pom:
1. With hat still inside out, place button on the seam.
2. Using thread needle and matching thread, sew the button to the inside of the seam.
3. Fasten off the thread.
4. Turn hat right side out, using a hook (or your fingers), thread the elastic loop from the faux fur pom pom through the stitches of the crown and loop it over the button.

Care Instructions:
Follow the care instructions listed on the package of yarn you chose to make the hat in, but remove the pom pom by unbuttoning it before washing and drying. Most pom poms will be destroyed in the machine washing process.
The Treviso Beanie is written by Rebekah Haas. I hold the copyright to this pattern. It should not be published, shared, or sold without direct permission of the designer. You are, of course, welcome to sell any items you make using this pattern. If you post pictures of your item on Instagram or Facebook, please credit me with the design by linking to my Instagram account or website. Thank you for choosing to make my pattern! I hope it inspires you!

Treviso Faux Knit Beanie Free Crochet Pattern