Yarn Room and Organization Tour!
I believe there is a super-sciency theory that states, “All things tend toward disorder.” Ok, it is the second law of thermodynamics. But this law has played out in my life time and time again as I watch my house become a mess mere hours after an in depth tidy. I just can’t seem to keep it clean. Obviously, having four young children and two dogs romping through the place doesn’t help. But if I am 100% honest, I’ve often heard myself saying, “I’m just not a tidy person.” Or, “I’m naturally disorganized and messy.” And the most often, “I’m basically chaos incarnate.”
Then why am I here giving you tips about organizing? Because if I can find a way to keep my calendar and W.I.P.’s (work in progress), and yarn in order, then I KNOW you can, too! Fun fact, we all have different personalities (I hate to spring that on you so suddenly), and we all have different ways of doing things. Organizing is no different. Some people like lots of little boxes and neat little cubbies. Some like labels. Some like baskets. Some like to see their things, some like to hide it away. However, I feel like a lot of us crafters tend toward a similar, visual organization style. We want to see what we have. We want to enjoy it.
So keep reading! I’m about to share how I keep my yarn room tidy, how I organize my yarn, how I store my W.I.P.s and finished objects, and how I keep up with all the craziness of my busy life - and how you can, too!
Want to remember this later? Save it to your favorite Pinterest board.
And follow me while you are there for more free crochet patterns and loads of crochet inspiration!
Yarn Room Tour, Yarn Organizing, Craft Room Organization, Craft Room Peg Board #craftroom #organizecrafts
This post contains affiliate links. I receive a small commission from your purchase through these links at no additional cost to you. See my Terms of Use for more details.
What do I use this room for?
I use it for yarn. OBVIOUSLY. Actually, when I start organizing any space, the first question I need answered is, “How does this room need to function?” closely followed by, “What activities will take place in this room?” After you answer those questions, the organizing and decorating is much simpler! For instance, I don’t actually crochet much at all in my yarn room. I usually take my projects to the family room or to my own room and relax and crochet with my family. Since I don’t actually crochet in this room, you will see I don’t have a cozy corner to curl up with a project - no overstuffed chair, no direct reading lamp to illuminate my stitches, no footstool to prop my feet up on. No, the purpose of this room is to have a single place to cohesively organize my yarn and blogging supplies. This room is the central nervous system of my business and needs to operate as efficiently as possible for me to bring you the stunning crochet patterns that you love!
Yarn Storage
One of the main purposes of my yarn room is yarn storage (again, OBVIOUSLY). Some people collect yarn as much as they crochet, and I, personally, have been back and forth on that. I’ve partaken in a few major yarn hauls, dragging my conquest back to my little fortress of yarny happiness, like a lioness dragging an impala across the Serengeti. I’m talking MAJOR yarn hauls. But I ended up using lots of that yarn for giveaways and even donating tons of it to people who make for an Etsy shop or for the homeless. Because what I learned from having massive amounts of yarn - if I can’t see all my yarn in a glance, I forget what I have and just buy more. If I have too much yarn, it becomes a burden to me and my family, so I only allow myself one shelf (ok, bookcase) of unused yarn.
I realize that there are many exceptions to the “don’t own too much yarn” rule that I have made for myself. For instance, if you are someone who makes crochet or knit items for an Etsy shop or for craft fairs, you will definitely need more yarn inventory on hand than I do. But the true purpose of the rule is to prevent from having more inventory that you can keep track of. If you are someone who needs a large inventory of yarn, I recommend a stash journal.
Since I do not make crocheted inventory for my Etsy shop (my shop is for you, the crocheter, to find something you love), I just need enough yarn to design patterns, not to make endless duplicates to sell. I limit myself to one nine-cube storage system and sort my yarn into the cubes.
I decided that, for me, sorting my yarn by color is most effective. When I start a project, I’m initially drawn to the color of the yarn, then I work the rest of the features into the design, whether that is thickness, fiber content, or other features. Sorting by color also helps me keep my blog on brand. I can see what colors I have (and what colors will eventually end up on my Instagram feed), and plan or buy yarn accordingly. I try to keep things sorted somewhat by weight and fiber within the color families, but, if I’m honest, I don’t work too hard on staying on top of that level of micro-sorting.
To help the yarn stay neat on the shelves, I wind almost all of it into cakes. I happen to prefer how yarn works up from a cake that any other form of winding (skein, ball, hank, etc.). I like that my cake doesn’t roll around, doesn’t tangle and slow me down. I also love that yarn cakes can stack neatly on the shelves and look much more organized than balls and skeins, which roll around and get messy. I use the winder from We Crochet. Currently, I use a cheap swift from Amazon, but it is beginning to wear out, so I might upgrade to the wooden one from We Crochet as well (they have so many amazing yarn tools!). However, if you are in a pinch, you can get a swift from Amazon to help you with those beautiful hand dyed yarn hanks.
I keep one canvas bin at the bottom as my “junk drawer.” It has random mismatched knitting needles, swatches, yarn barf, and basic chaos.
Yarn Tool Storage
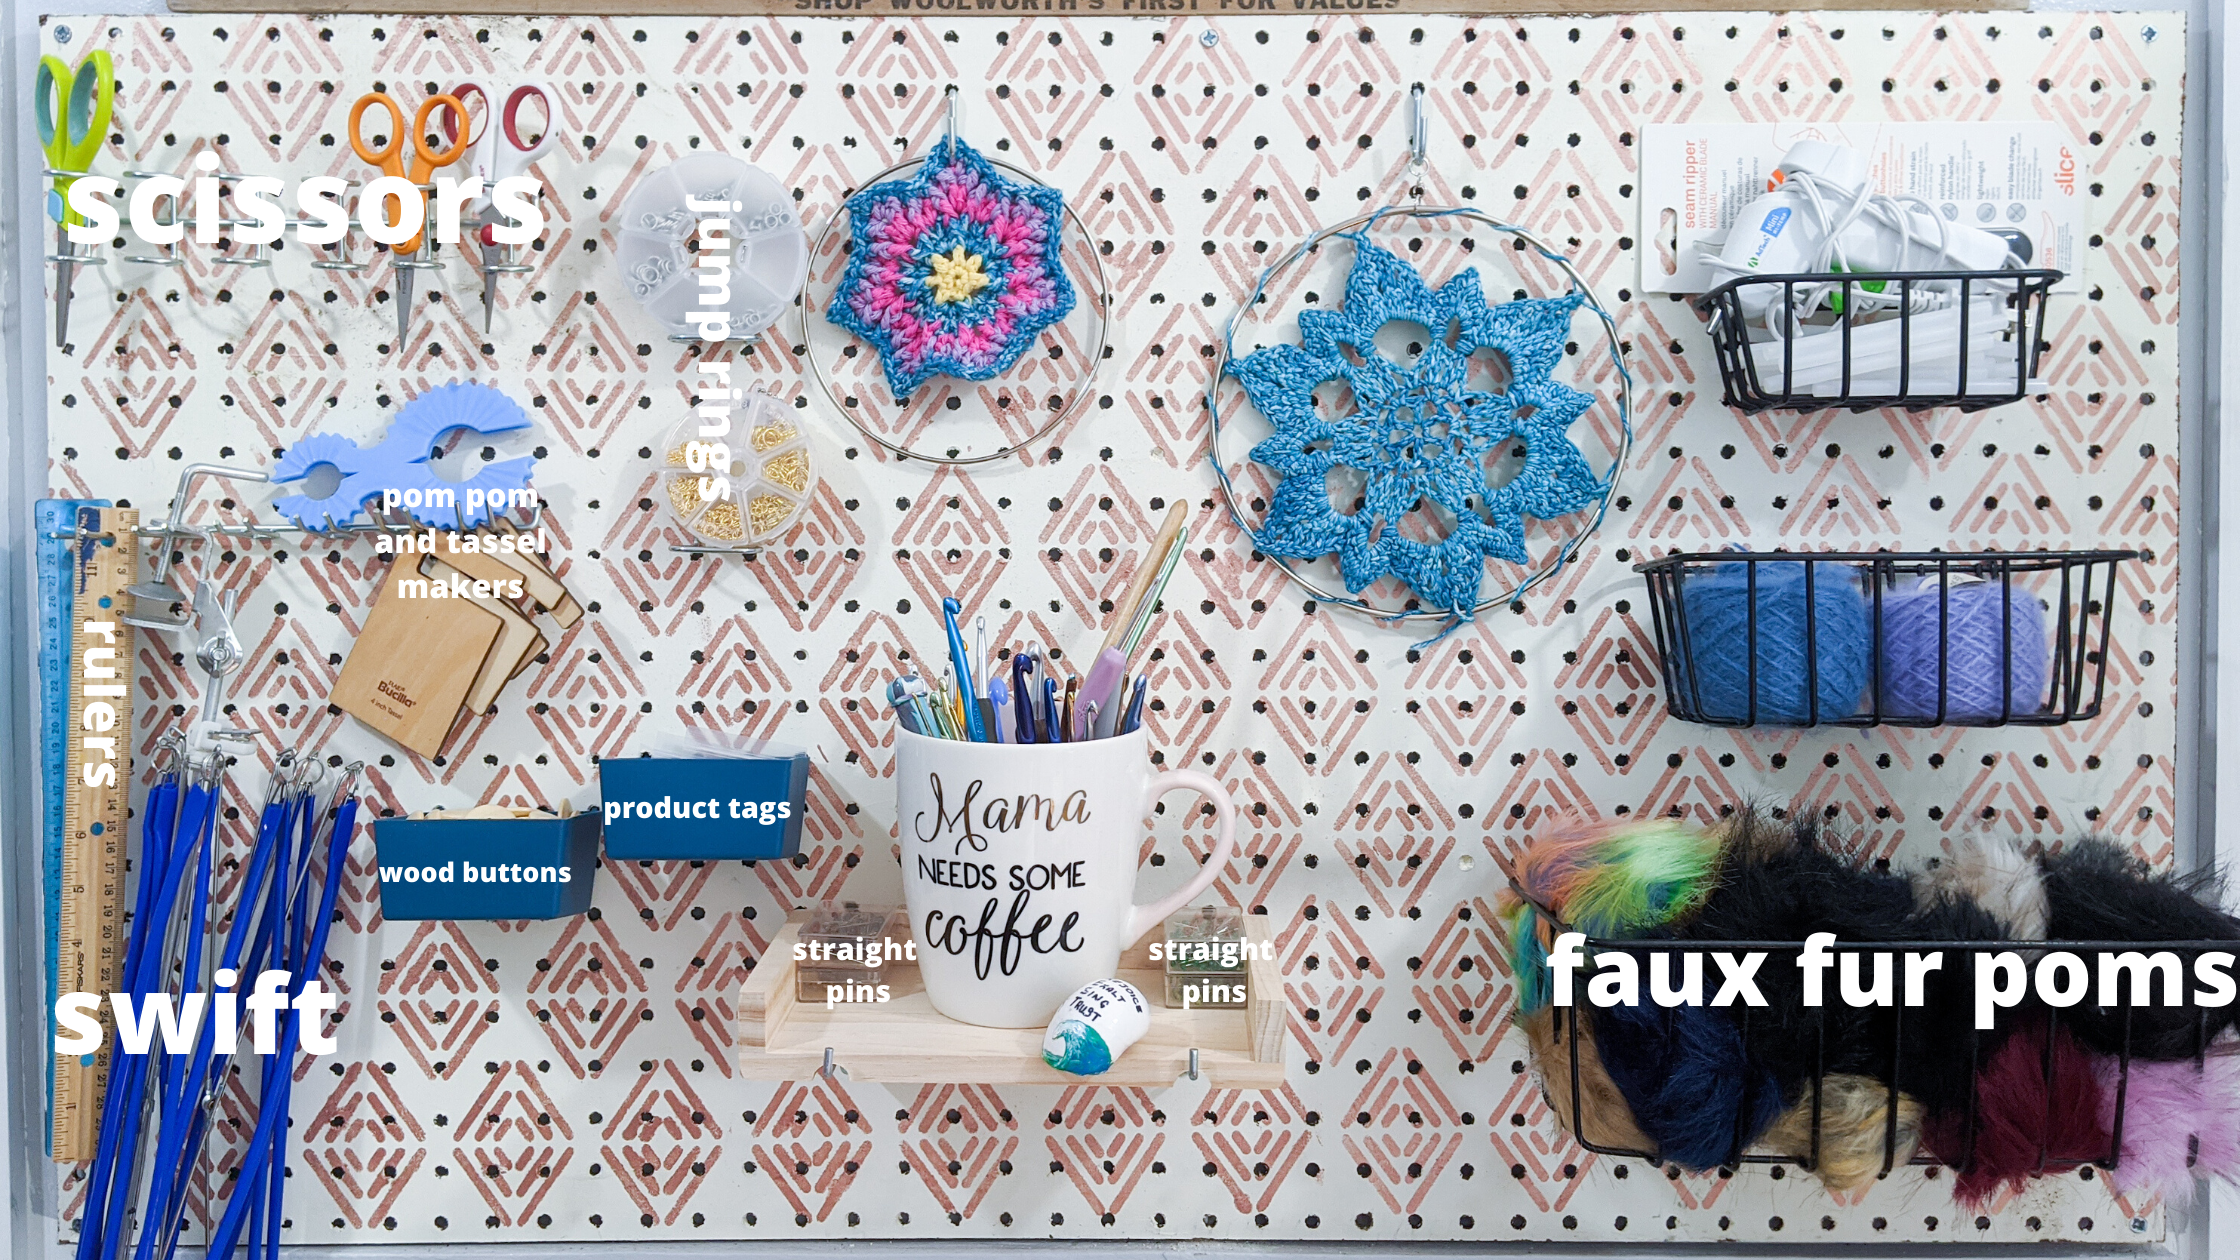
I like yarn tools. Hooks, stitch markers, buttons, pom poms, scissors, tassel makers, pom pom makers: i LOVE all the THINGS!!! When we talk about visual stoage in a craft room, I think the first thing that comes to mind for most people is a peg board. Of couse, I went for Pinterest craft room goals and DIY’d myself a peg board!
I purchased a basic brown peg board from our local Home Depot and gave it a nice coat of cream chalk pain. After the couple coats to thoroughly cover the brown were dry, I taped down a stencil and used rose gold chalk paint to give my peg board a little more fancy flair! Please rememer when you mount your peg board, you need to leave about an inch or so of space between the board and the wall for the pegs to work. I grabbed a pack of screws and A LOT of washers when I picked up the peg board from Home Depot. You can purchase stand-off mounts, but using a stack of eight washers behind each corner and in the center of the four sides was much cheaper than ordering eight nice stand-off mounts. Of course, it’s entirely up to you if you want to fiddle with the washers or not.
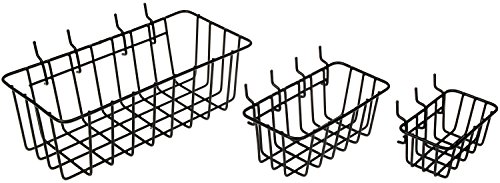
Once I got my fancy board up on the wall, I got my good freind, Amazon, to send me some peg board supplies (ok, we aren’t REALLY friends and I just ordered them). I’ll link here the set of baskets, the wood shelf, and the set of hooks I ordered:
After my packages arrived, I had the fun job of putting everything up on my board! Not gonna lie, it is so nice to be able to easily find everything I need! And it is cute and decorative, too!
I use a mug that was given to my by the mom of a little girl I used to babysit, but if you are looking for a fun hook mug, check out my Etsy shop! It’s full of fun crochet-inspired mugs.
Easy hook storage!
W.I.P. Storage
When I start a W.I.P., I assign it a project bag that is fully stocked with everything I need to complete the project. The bag will have the hook, scissors, yarn needle, stitch markers, and anything else I need to make the design. I love having an assortment of project bags of various sizes to help each project to stay organized. I generally only have two or three “active” WIPs at a time (by active, I mean, I am actively working on it. I sometimes have projects on the back burner just hanging out in their bag until I am ready to pull them out an finish them).
shop project bags
In order to have each bag fully stocked, I have extras of every hook size, loads of scissors, and everything else I might need. I keep everything sorted on my peg board. When I start a project, I select a bag or basket and load it with everything I’ll need and stash them in my favorite crocheting spots. I generally work on 2-3 projects at a time: one challenging pattern, two easier patterns. I work on the complicated one when I have time to take progress pictues (like when the kids are napping), and the easier ones I work on when I’m watching TV or listening to my hubs play guitar. When a W.I.P. goes into time out, I hang the bag on a hook down in my craft room. I built that little shelf in the corner out of scraps of materials I found at our local Habitat for Humanity. I grabbed a pack of C-hooks from the Home Depot and that is where all my bags and baskets hand out! Which leads me into the next thing: what do I do with finished objects?
Don’t just my cords. The room still needs a few finishing touches, but it’s functional!
How I organize Finished Objects
First, I think it’s important to establish the number of finished objects I have on hand won’t be as many as someone who stocks their online shop with finished crocheted items. The majority of the my finished objects are prototypes of the patterns I’m developing. I organize the F.O.’s by size. I sort them by large items (i.e. blankets, sweaters, etc.), mid sized items (mostly shawls and scarves), and small things (hats).
In the pictures above, you will see two placews labeled “f.o.” The first being a large black ottoman under the desk (the desk pictured it my sister’s workspace. She designs the art we use for our mugs and bags in the Etsy shop). I bought the ottoman on Amazon to use elsewhere in the house, but my kids were too hard on it, so I moved it in here to store my finished objects safely away from the dog hair!
My small finished objects are stored in the picnic basket on the shelf above the wips. I’ve had this basket for years, but if you need one, I highly recommend checking your local thrift shop first. I also go to Goodwill for baskets - which I’m completely obseed with. I mean, I really love using baskets as decorative storage, but they can be a little expensive for my penny-pinching mindset.
Finally, I store my mid-sized finished objects on a scarf organizer from Ikea. My mom got me this thing AGES to attempt to tame my out-of-control scarf habit. I’ve since decluttered my scarves and don’t need to use this for it. So it works fantastic for visually displaying all my wraps, shawls, and scarves. I can take them out whever I want to photograph them.
I don’t keep every prototype I make. I love to give my makes away and often design with a particular person in mind to give the finished item to. But I still have quite a few that end up here, but I don’t really want to part with them yet. Maybe someday I’ll have too many and I’l sell them all, but until then, this system is working well for me!
How to store shawls
But wait, there is more!
But not today! Can you believe that is only half of my craft room? This is the crafty half, for sure. The other half of the yarn room is the blogging center. It has all my tech gear, my schedule, my calender, my designing books, things like that. However, this blog post is long enough! Stay tuned, though, because I am putting together an office tour - how I organize my business. I can’t wait to share it all with you! If you want to make sure you don’t miss it, sign up for email notification - you will get a cool freebie AND be first to know of new content!


